This tutorial will explain how I taught Cooper to press a button which has a symbol representing a type of food. This tutorial is the prerequisite for the “counting” trick.
Cooper does a few different tricks using talking buttons: pressing a button which represents an object or type of food; pressing yes/no to say whether he wants something or not; pressing numbers to indicate how many of an item are in front of him. This tutorial will start out by using food buttons because I think it’s easier for dogs to associate a button with something concrete (food) rather than abstract concepts like yes/no and numbers.
Supplies needed: recordable buttons or magnetic whiteboard with magnets, 2+ kinds of treat
Video of Cooper performing this trick
Supplies


I use “Talking Tiles” which are recordable talking buttons, but before I had those I used a magnetic whiteboard, plain white magnets with a dry erase surface, and permanent markers. I drew symbols on the magnets with the permanent markers and stuck them to the magnetic whiteboard. When he touched a magnet I said the word out loud. I used permanent markers instead of dry erase markers because dry erase marker rubs off too easily when the dog touches it.
If you’re able to get talking buttons or something similar, that’s the preferred option because the instant feedback helps the dog learn faster. For the sake of simplicity I will use the word “buttons” throughout this article, even though some of you might be using something other than buttons.
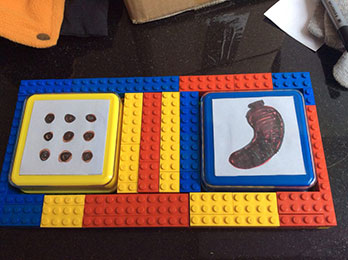
(I sometimes like to put my buttons in a Lego tray to keep them in place, but that’s not required and lately I haven’t been using the tray)
Prerequisites
Your dog must know at least 2 different words for types of food or treat, 3+ is better
If you’re using buttons, the dog must know how to press or stand on the button that you point to. Whether he needs to press or stand on it depends on how hard the button is to press.
If you’re using another surface like a magnetic whiteboard, the dog must know how to touch the area of the board that you point to.
Here’s a helpful video about teaching your dog to touch an object: Paw Targeting
Getting Started: The First Button
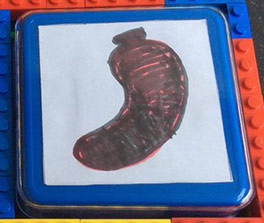
To begin with you should create one button for the food/treat word that your dog responds to the best. For me that was “sausage,” so I drew a sausage on a button and recorded it to say the word “sausage” when pressed. I recommend that you use only black ink to draw your symbol, and try to make the symbol very bold. It doesn’t have to look exactly like the symbol. In fact, it’s better if it doesn’t. It just needs to be easily distinguishable from other symbols.
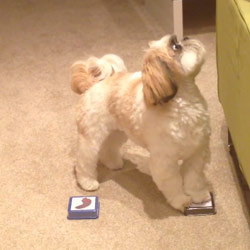
Get your dog to put his paw on the button, then give him the treat even if he doesn’t press it hard enough to play the sound. The treat must be the same one that’s depicted on the button. Once he is consistently pressing the button when you tell him to, only give him the treat when he successfully makes the sound play. If he steps on it and the sound doesn’t play, press it down yourself and then treat him. As soon as he reliably and successfully presses the button on command (7/10 times) move on.
Moving On: Two Buttons
Testing Time!
So far your dog has been pressing any button that he wants to. This is great for getting him to understand what the buttons mean, but the next step is to get him to press a specific button based on a voice command.
- Hold a treat in your hand and show it to your dog. If your dog gets too excited when he sees the treat and can’t focus, you might need to hide it in your hand instead. The treat should be the kind which is on the first button you created. Say the name of the treat, then point to its button. When the dog presses the button, give him the treat.
- Repeat the step above but without pointing to the button. If he presses the wrong button, ignore him until he presses the correct button. When he does press the correct button, give him the treat.
- Repeat steps 1 & 2 for the second button, then start alternating between the two buttons. It will likely take a lot of repetition and trial and error before your dog will consistently press the correct button.
Upwards and Onwards
Once your dog has mastered those two buttons, there are a number of ways you can continue to challenge him. Here are some ideas:
1. Shuffle the order of the buttons around to make sure he hasn’t just memorized their position
2. Instead of showing him the treat AND saying the word, do one or the other: show the treat OR say the word.
3. Add more buttons! I recommend that you only add one button at a time.
4. Add a button for a type of food that he doesn’t yet know the word for
5. Add a button for a toy instead of a treat
6. Add a button for an action, e.g. “walkies”
The Science
Although this trick and tutorial are completely unscientific and are just for fun, there has been at least one scientific study where a dog used a talking panel to communicate. There’s an article in the April 2008, Volume 11, Issue 2 of the “Animal Cognition” journal called A dog at the keyboard: using arbitrary signs to communicate requests.” For copyright reasons I’m unable to share the article with you, but I will summarize it: the authors created a communication device that had six buttons representing walk, [blank], petting, toy, water, food, crate, urine and taught a dog to use it to communicate her desires. Below is a video of their dog Sofia using the device: